Twitter Bootstrap, customising CSS
I've always wanted a way to customise Twitter Bootstrap easily, without having to overwrite existing CSS styles with my own or worry about how I would keep it up to date. So I decided it was time to try and put together a process to build my own Bootstrap CSS file using the .less files Bootstrap is built from. Here's what I managed to come up with.
Getting your tools ready
First things first, you'll need to make sure you have your tools ready.
- Node.js: To power the Twitter Bootstrap build process.
- npm: For installing the other tools we need. This is normally packaged with Node.js but if you find it isn't, check out its documentation.
- Bower: Will manage retrieval of Bootstrap and its dependencies.
- Grunt: Used to build our customised version of Bootstrap.
For node and npm, check out their websites for more information on their installation. Under most circumstances, npm will be available after you have installed node. Once they are available, you can use them to install grunt and bower.
Execute this command
npm install -g grunt-cli bower
The grunt-cli package provides the grunt command that we'll be using to execute our build tasks.
EACCES error?
If you ran the above command and received an EACCES error message, then the user you ran npm with hasn't got permission to the directory that globally available modules are installed to. This is usually seen on Linux based systems as they'll default to /usr/local/lib/node_modules/. There are a few ways to approach this and the one I'd recommend the most would be to configure npm to use a directory underneath your users $HOME.
Execute this command
npm config set prefix ~/npm
Append this to your ~/.bashrc file
export PATH=$HOME/npm/bin:$PATH
If you're still having problems with this, try searching for help with it elsewhere as there are various other approaches available. Most suggestions recommend using sudo, but I prefer not having to invoke root powers to install global modules.
Grabbing Twitter by the Bootstraps
We should now be ready to roll. Time to grab Twitter Bootstrap. We'll create a folder to house our project and ask bower to retrieve Bootstrap for us.
mkdir website
cd website
bower init
bower install --save bootstrap
mkdir webroot
mkdir webroot/css
The bower init line is interactive and will ask you a bunch of questions. For our basic usage you should be able to go with the default for all of them, except you may want to consider the question [?] would you like to mark this package as private which prevents it from being accidentally published to the registry?, which I normally answer with Y as you can always change it later if needed.
Hopefully, you'll see bower produce messages about Bootstrap and any dependencies, like jquery. Once it has finished, there will be a new bower_components directory that contains Bootstrap and probably jQuery too.
What's the plan?
We have Bootstrap and our tools at the ready but what approach are we taking with our customisations? I prefer to leave anything under bower_components untouched, to make life simple if we ever update anything underneath it (which is simple with bower update). The idea is the follow:
- Create a folder for our site code to live in.
- Have our own
.lessfile, in our folder, that includes the Bootstrap.lessfiles. - Borrow parts of Bootstrap's
Gruntfile.jsfor building our own.cssfile.
This will provide us with the ability to exclude parts of Bootstrap that we may not be using, slimming down the size of the .css file produced. Plus, the chance to customise the Less variables that control the appearance of Bootstrap, like its colours, sizes and grid. Following Bootstrap's approach closely for building means we'll retain their copyright / license banner, minimised .css file and the .css.map file for easier style debugging.
Getting ready to grunt
We're going to be using grunt and several of its task modules. It's always a good idea to keep track of these when installing them into your project, through creation of a package.json file. We'll use npm for the task.
npm init
Again, you'll be asked a bunch of question. If you want to make sure that you never accidentally publish this to the package registry, add a "private": true" to the package.json file.
What grunt packages do we need?
It's a good idea to check what Bootstrap is using, to protect yourself from any changes them may make to their build process. Within bower_components/bootstrap/Gruntfile.js you will find lines that declare the CSS build tasks.
// CSS distribution task.
grunt.registerTask('less-compile', ['less:compileCore', 'less:compileTheme']);
grunt.registerTask('dist-css', ['less-compile', 'autoprefixer', 'usebanner', 'csscomb', 'cssmin']);
From the registered tasks we can build a list of modules to install and task definitions to duplicate. We can also skip certain items, if we don't need them. In this post I won't bother with less:compileTheme as I want the standard Bootstrap for customisation, plus I'll skip the csscomb task as that is used for CSS code style formatting. This gives us the following list:
- less:compileCore
- autoprefixer
- usebanner
- cssmin
Those are our grunt task configurations and the module names. We now need to check bower_components/bootstrap/package.json file, as it lists the modules installed and their versions, allowing us to easily match module names against the grunt tasks.
  "grunt": "~0.4.5",
  "grunt-autoprefixer": "~0.8.2",
  "grunt-banner": "~0.2.3",
  "grunt-contrib-cssmin": "~0.10.0",
  "grunt-contrib-less": "~0.11.3",
Now we'll install those module versions for our own use.
npm install --save-dev grunt@~0.4.5 grunt-autoprefixer@~0.8.2 grunt-banner@~0.2.3 grunt-contrib-cssmin@~0.10.0 grunt-contrib-less@~0.11.3
Sniffing around Bootstrap's Grunt
Our modules are ready, we now need to prep our own Gruntfile.js and drop in our customised versions of the tasks we're mimicking from Bootstrap. Create Gruntfile.js in our project folder and open it up in an editor, along with bower_componets/bootstrap/Gruntfile.js. Look for the following tasks:
- less:compileCore
- autoprefixer
- usebanner
- cssmin
Then we need to take a few steps to customise it for our usage.
- Remove additional task configuration that isn't need for our use.
cssmin.docsless.compileThemeautoprefixer.docsautoprefixer.examples
Update configuration
// in less.compileCore
files: {
  'webroot/css/<%= bspkg.name %>.css': 'webroot/css/customboot.less'
}

// in less.compileCore.options
sourceMapURL: '<%= bspkg.name %>.css.map',
sourceMapFilename: 'webroot/css/<%= bspkg.name %>.css.map',
paths: '<%= bspath %>/less'

// in autoprefixer.core
src: 'webroot/css/<%= bspkg.name %>.css'

// in cssmin.core, note we remove the "-theme" related line
files: {
  'webroot/css/<%= bspkg.name %>.min.css': 'webroot/css/<%= bspkg.name %>.css'
}

// in usebanner.options
banner: '<%= banner %>'

// in usebanner
files: {
  src: 'webroot/css/<%= bspkg.name %>.css'
}
After these changes, your Gruntfile.js should look like this:
module.exports = function(grunt) {
  grunt.initConfig({
    bspkg: grunt.file.readJSON('bower_components/bootstrap/package.json'),
    bspath: 'bower_components/bootstrap',
    banner: '/*!\n' +
            ' * Bootstrap v<%= bspkg.version %> (<%= bspkg.homepage %>)\n' +
            ' * Copyright 2011-<%= grunt.template.today("yyyy") %> <%= bspkg.author %>\n' +
            ' * Licensed under <%= bspkg.license.type %> (<%= bspkg.license.url %>)\n' +
            ' */\n',
    less: {
      compileCore: {
        options: {
          strictMath: true,
          sourceMap: true,
          outputSourceFiles: true,
          sourceMapURL: 'bootstrap.css.map',
          sourceMapFilename: 'webroot/css/bootstrap.css.map',
          paths: '<%= bspath %>/less'
        },
        files: {
          'webroot/css/bootstrap.css': 'webroot/css/customboot.less'
        }
      }
    },
    autoprefixer: {
      options: {
        browsers: [
          'Android 2.3',
          'Android >= 4',
          'Chrome >= 20',
          'Firefox >= 24', // Firefox 24 is the latest ESR
          'Explorer >= 8',
          'iOS >= 6',
          'Opera >= 12',
          'Safari >= 6'
        ]
      },
      core: {
        options: {
          map: true
        },
        src: 'webroot/css/bootstrap.css'
      }
    },
    cssmin: {
      options: {
        compatibility: 'ie8',
        keepSpecialComments: '*',
        noAdvanced: true
      },
      core: {
        files: {
          'webroot/css/bootstrap.min.css': 'webroot/css/bootstrap.css'
        }
      }
    },
    usebanner: {
      options: {
        position: 'top',
        banner: '<%= banner %>'
      },
      files: {
        src: 'webroot/css/bootstrap.css'
      }
    }
  });

  // Loading our grunt modules
  grunt.loadNpmTasks('grunt-autoprefixer');
  grunt.loadNpmTasks('grunt-banner');
  grunt.loadNpmTasks('grunt-contrib-cssmin');
  grunt.loadNpmTasks('grunt-contrib-less');

  // CSS distribution task.
  grunt.registerTask('dist-css', ['less:compileCore', 'autoprefixer', 'usebanner', 'cssmin']);

};
less is more
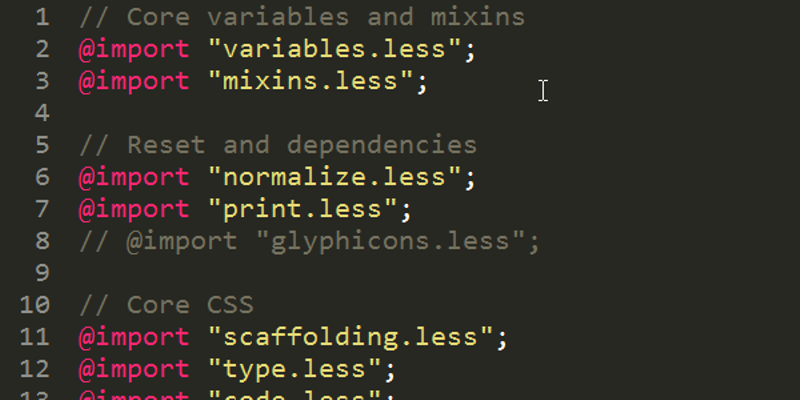
We're almost there! One last step before we can execute grunt is the creation of our webroot/css/customboot.less file. The contents of which will be exactly the same as bower_components/bootstrap/less/bootstrap.less so take a copy of that file and rename it for our use.
First run
Let's do this. It's finally time to run grunt and execute our dist-css task.
grunt dist-css
This should output something similar to:
Running "less:compileCore" (less) task
File webroot/css/bootstrap.css.map created.
File webroot/css/bootstrap.css created: 131.45 kB → 131.5 kB

Running "autoprefixer:core" (autoprefixer) task
File webroot/css/bootstrap.css created.
File webroot/css/bootstrap.css.map created (source map).

Running "usebanner:files" (usebanner) task
? grunt-banner completed successfully

Running "cssmin:core" (cssmin) task
File webroot/css/bootstrap.min.css created: 132.64 kB → 109.39 kB

Done, without errors.
Everything is awesome
We did it! In our webroot/css folder are the following:
bootstrap.css: Our customised Bootstrap CSS file.bootstrap.min.css: Minimised version of our custom Bootstrap.bootstrap.css.map: For debugging our CSS.customboot.less: Our Less based customisations of Bootstrap.
Customising
Trimming the fat
Taking our customboot.less file, we can now trim Bootstrap a little by simply commenting out parts that we aren't currently using. For example, you might not be using the alerts or progress bars. Rebuilding now results in a working Bootstrap file that's a little bit lighter. If you start using those components, you can simply uncomment them and rebuild.
// @import "alerts.less";
// @import "progress-bars.less";
Personally, I often like to use Font Awesome with Bootstrap, meaning that Bootstrap's glyph icons won't get used. So I'll comment it out // @import "glyphicons.less";, saving myself ~10 kb of CSS and avoiding any chance of loading the icon font.
Ch-ch-ch-changes
How about we change some colours and sizes? Just peep inside bower_components/bootstrap/less/variables.less for the variables available and append your changes to the bottom of our customboot.less file.
// This will not look nice!
@body-bg:        #efe;
@font-size-base: 12px;
@headings-color: red;
@navbar-height: 100px;
You can go your own way
Since we're operating in the land of Less, you can always start using it to create your own CSS in addition to Bootstraps. Or even create new CSS rules that are based off Bootstraps existing variables. That way, if you change a core Bootstrap colour, it'll be reflected in your own rules that use it.